

If you want to Download, Upload, Watch or Browse Anything with the Highest Network Speed than you used before, here is the way. In this Tutorial I am going to Connect my PC to a Cloud Storage using Remote Desktop Protocol and I also teach you how to get the Downloaded files to your own PC from the Remote Desktop. This will be Helpful for the ones who are suffering from Online Education because of Lack of Signal and also for the all others who are suffering from Poor Signal. By this way, you can also Save some of your Data too. It is because this only use data to Share the Screen, Get the Sounds and our Commands. So once you Download a Big Software, App or something like this, it only get Data to get your Commands and to Share the Screen. So you doesn't need to give your Data to Download Files, Watch Videos and such things.

(Warning! Sometimes this will Suspend your GitHub Account without any wrong. So this will not be good for a long time journey. Use another method like Google Cloud Platform or such other way which was written by me after this one if your account got suspended.)
>>> Please Read this Article and Watch the given Video Carefully. Before going on, I would like to tell something about VPS.
What is VPS?
>>> A Virtual Private Server (VPS) is a virtual machine sold as a service by an Internet hosting service. The virtual dedicated server (VDS) also works in a virtualized environment but some CPU cores are dedicated for it, which is not the case with VPS. A virtual private server runs its own copy of an operating system (OS), and customers may have superuser-level access to that operating system instance, so they can install almost any software that runs on that OS. For many purposes it is functionally equivalent to a dedicated physical server and, being software-defined, can much more easily be created and configured.
>>> VPS is often a great option for SaaS providers, game makers, programmers, companies that have outgrown their shared hosting, and any company who needs a secure and affordable backup environment. A virtual server costs much less than an equivalent physical server. However, as virtual servers share the underlying physical hardware with other VPSes, performance may be lower, depending on the workload of any other executing virtual machines.


>>> Now, I would like to give you a small definition about what is RDP and how it works.
What is RDP?
>>> RDP (Remote Desktop Protocol) is a Network Communications Protocol developed by Microsoft, which allows users to Remotely Connect to another computer. RDP provides a Graphical Interface for Remotely Connecting one computer to another. To use RDP, the user originating the RDP connection request must be using a computer that is running RDP client software. The computer that is being accessed must be running RDP server software, which allows the client to connect remotely. Once connected, the user originating the request will be able to see the desktop of the computer to which they are connecting through RDP.
>>> Currently, some version of RDP is available for all common operating systems, including Windows, Linux, Unix, Mac, iOS, Android, and others. The most broadly known RDP client software is the one provided by Microsoft, which is currently called “Remote Desktop Connection”.

How RDP Works
>>> RDP Transmits Screen Information from the Remote Terminal Server to the client, and keyboard and mouse inputs from the Client to the Remote Server. Communications between the client and the terminal server are highly asymmetrical. A lot of data flows from the server to the client, and not much from the client to the server (The Graphical Screen Information comprises much more data than do keyboard and mouse inputs).

Some Key Features of RDP
>>> 128-bit Encryption
>>> 32-bit Color Support
>>> Audio, File System, Printer, and Port Redirection to Allow Users to Connect to Local Resources from within a Terminal Session
>>> Support for a number of different Network Topologies
>>> You can do this via any kind of a Phone, Laptop, Computer or a Tablet. This will surely work fine on any type of device which has at least 2GB of Ram. If your Signals are too slow, the Remote Desktop Preview will be able to Lag at some times. But it isn't much matter for your Download or Upload Speed because it doesn't depend on your PC or Mobile. It doesn't care about your Ram or present Network Speed.
This is how to do this in your PC...
>>> Now I am going to tell you how to do this. First of all you need a PC or a Laptop with an Internet Connection. (May be WiFi or Mobile Hotspot) You should have to do whatever I do in the Video given below. So watch this Video first and after that you can start the journey.
>>> First make a new Gmail Account and a new GitHub Account. If you already have those things, my recommendation is to make New Accounts because if you did any wrong thing sometimes your GitHub Account may be able to Suspended. After making a new Gmail and GitHub Account, you can go to this link and do whatever I do in the Video given above.
Make your GitHub Account From here.
>>> Once you made your GitHub Account, don't forget to Verify your Account by Clicking on the Mail which will be sent to your G-Mail account which you used to Register with GitHub. Now go to the below GitHub page and Click on the Fork on the Right Side Corner. Then Copy the Name which can be seen in the README.md. Then click on the Settings Tab and then choose the Secrets Tab. Then Create a New Repository Secret. For the Name of it, Paste the Name Copied by you before. (NGROK_AUTH_TOKEN)
RDP Coffin and it's Workplace Link which is on GitHub.
(Author- CoffinRDP)
>>> Now you should have to go to the Website given below and Signup with it. You can Easily Login to the ngrok Website by clicking on the Google Icon and Selecting your Account. After Downloading ngrok Stable Windows Software, Extract or Drag and Drop it to the Desktop or such easy place. Next Copy the Second Code of the Setup & Installation Tab without "./" and then Paste it in the ngrok Software which runs on the the Command Prompt and press Enter. Then go to Your Authtoken Tab and Copy your Authtoken Key. Now it's the time to Paste it in the Value Section of the New Secret Container.
Make your ngrok Account From here.
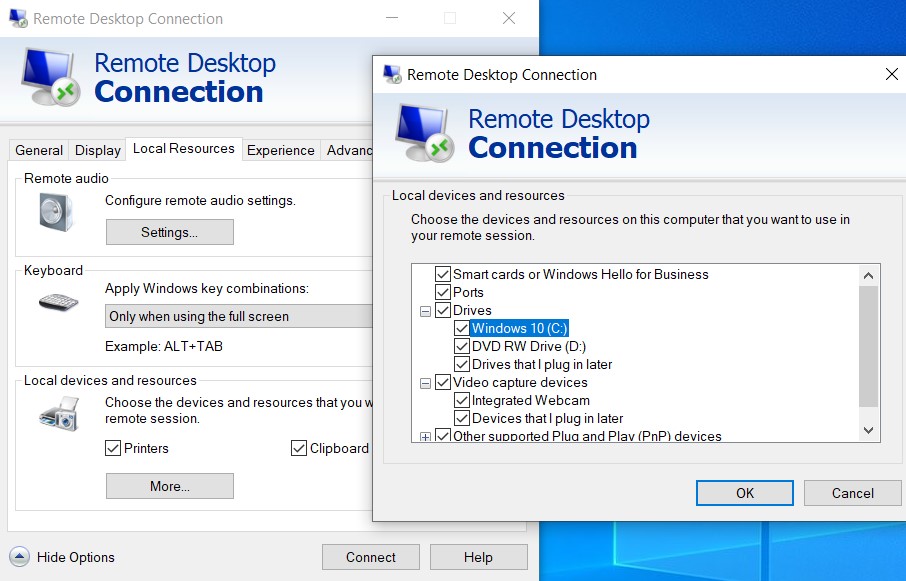
>>> After doing all those things, Click on the Add Secret Button and then Click on the Actions Tab. Next Click on the I understand my workflows, go ahead and enable them Button without and doubt. Now you should have to Click on the RDP_COFFIN Button which can be seen under the All Workflows Tab. Then Click on Run Workflow and again Click on the new Run Workflow Button which is Green in Color. Now please wait for a moment and once it shows your RDP Coffin, Click on it and then Click on the Build Button. (If this doesn't Show anything, like in the Video, please try to Reload the Page). Then wait till it Build the RDP IP, Username, Password and such things. Once all the Resources Load successfully, Search for RDP in your Search Bar and then hit Enter. Now Change all the Settings of RDP as I did in the Video and then Copy the tcp Code without "tcp://". Now Paste it in the Computer Section of the Remote Desktop Connection.

>>> After the above process, you should have to click on the Connect Button and then Copy and Paste the Username and the Password of this. You can get it in the Last GitHub Page. Username for this will be Administrator but I can't tell anything about it's Password. So Copy it from that place and Paste it in here. Once you start that RDP Service, you can see another Operating System which is running together with your Main Operating System. It looks like a Virtual Desktop and you can work on that Remote Desktop for freely. It has a 255GB SSD Storage, Dual Core CPU and 7GB Ram.
>>> You should have to keep this in your mind that this Operating System is Running on a Cloud Storage and once you Closed this, It's Data will not be able to Restore again. So you need to Copy all the Important things which were Downloaded by you and Paste them into your Physical Hard Disk or a Portable Device like External Hard Disk, Pen Drive or a SD Card. You can also Upload them to a Cloud Storage too. There are a lot of sites which gives you Free Limited Cloud Storages like Google Drive, Dropbox, MediaFire and Mega.
This is how to do this in your Mobile...
>>> First you should have to make a New Gmail Account and then make a GitHub Account from it. Then Register with ngrok easily by clicking on Login with Google. Use the Links given above to do them. Once you finished, you should have to Download the RD Client app and set it's settings like below. All the other steps are same as the PC one and only the RDC will be changed to RD Client.

>>> You doesn't need to Download ngrok Software or run that Command which was used by us when we did this in the PC and if you want, you can stop running that Commands from your PC too if it doesn't Suspend or do anything to your Account. Yes I know it will be more easy to you but if your Account was Suspend because of that, there is nothing to do except doing as before.
RD Client App Free Download. (Remote Desktop App)
>>> Click on the + mark of this App and click on Add PC. Then do all the things as I do. It will be much easier to you if you use a Mouse to controll this. You can simply do this by getting an OTG Cable and setting it to your Phone and plugging it's other hand to your Mouse if you have a one. But however it is not much bad of using your Finger or Touch Pen to do this. Here is an example photo which shows you how to set the Remote Desktop via this RD Client App.

>>> Before you going on, you should have to know some important things about GitHub Account Suspending case. Sometimes it would be a mistake and you can get your Account back by Contacting them. If it was because of a fault of you, you may have to make a New Gmail and do all the others from the Beginning. But if you do this again and again, your New Accounts will be Flagged because they can notice that the same IP Address is trying to do this again and again. So you should have to use Another Device and make your Gmail and GitHub Account from it or to wait for some time at nearly 5 Hours and do it again. If you can to change your IP Address and some of other details, you will be able to do this without any wait.
>>> If your Account was Banned again and again, stop doing this because it will be boring to make this again and again. But don't worry, there are a lot of ways to make your Internet Connection Faster than ever and some of them are in our Blog and YouTube Channel.
>>> Now all the tasks are complete and here are some external links which will be helpful to you to go ahead.
Speedtest by Ookla, The Global Broadband Speed Test.
Speedtest by Netflix
Mbps to MBps Converter.
Mega Cloud Storage.
>>> Here are some external things about Internet Speed Measurements which will be useful for your day to day life.
Bits per second
>>> When computers send information over the internet, that information is in bits or bytes. The bits or bytes take time to reach their destination. That time is measured in seconds. So internet speeds are measured by identifying how many bits or bytes are transferred in one second, hence bits per second, or bytes per second.
Because the bits and bytes are so small, the number transferred in a single second is almost always well over 1,000. The common practice is to express those large numbers using the metric-based prefixes:
>>> kilo for 1,000
>>> mega for 1 million
>>> giga for 1 billion
Putting this all together, internet speeds can be measured in several different ways as well.
>>> kilobits per second (Kbps)
>>> kilobytes per second (KBps)
>>> megabits per second (Mbps)
>>> megabytes per second (MBps)
>>> gigabits per second (Gbps)
>>> gigabytes per second (GBps)
While any of these expressions of speed could be technically correct, internet service providers usually advertise the capacities of their services using the bits measurements of Kbps, Mbps, or Gbps, over the bytes measurements, presumably because the numbers look eight times bigger.
Internet speed conversion chart

>>> So now I think you can make this correctly without any doubt. If this was really helpful to you don't forget to Like, Comment and Share. If you have any question about this, just keep a comment describing your issue and I will reply you as soon as possible.
Thank You for Reading!
To this,
Vishal Kavinda
(The Owner and Founder of Technoland World)
To this,
Vishal Kavinda
(The Owner and Founder of Technoland World)
Tags:
.Internet & Networking
.Videos
Fast Internet
Free VPS
High Speed Virtual Machine with Preinstalled Software
How to make a Free RDP
Improve my Internet Connection
Speed Up Network Connection